Photoshop Techniques covered in this tutorial:
- How to duplicate your image
- How to duplicate a layer from background
- How to create a new layer
- How to use the Free Transform Tool
- How to use the paint bucket tool
- How to move layers
- How to change the opacity of an image
- How to put a border on your image
- How to move images from one to another
- How to add a layer style
- How to add text
- How to speed up your work by using shortcuts
In this tutorial I use Photoshop CS. Any shortcuts I use are for the PC and not for Mac. For those of you that are using a Mac just simply follow the instructions without the shortcut keystrokes (If you are using a Mac and know the shortcuts please contact me and I can add them to this tutorial).
Step 1 - Images Required
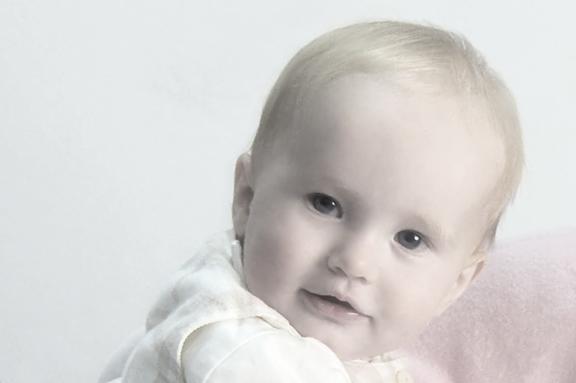
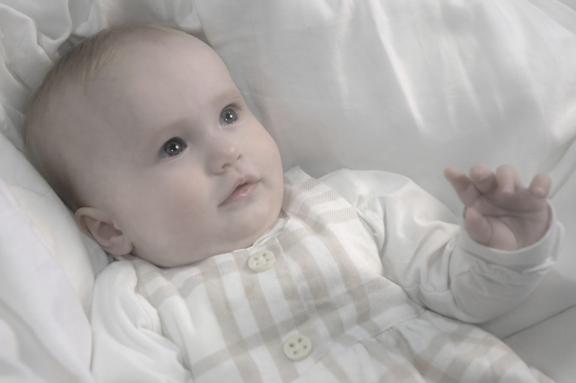
Grab your digital camera or scan some photos of your new little one. Here are the images I used for this tutorial. These are from a photo shoot I did awhile ago. I only used two for this tutorial but you can have as many as you like.
TIP: Ensure that your images are of the highest resolution and quality for the best results. Depending on the size you wish to print your announcements make sure the ratios you use are the same as those for printing. It is best to do your work in the largest possible format. It is easy to size down to your printing requirements then to realise you made them to small to begin with and have to restart again. If you size up, you lose quality and risk your images being pixilated
Colour Management is another issue you need to be concerned about. Not all monitors are calibrated the same. Therefore, what you see on your monitor may look different on a friends monitor or the printers. Before you send your new creation to get printed. Ask them to do a sample so that you know the colours are correct. You don’t want to be disappointed with the look of them when you have ordered 100 plus. If you are printing them on your own printer, do a test run because the colour calibration of your monitor and your printer may not be the same.
Step 2 - Duplicate Image and Layer
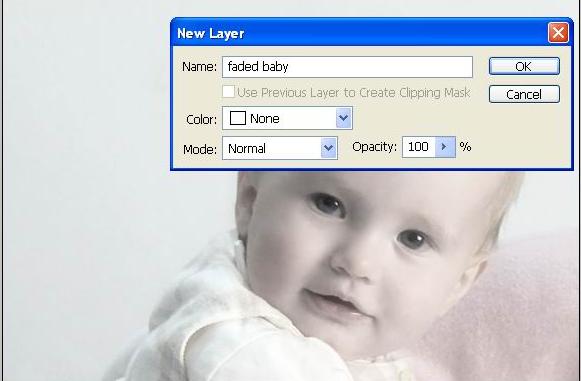
Open up your images in PhotoShop. Duplicate your images so that you are not working on your originals. Make sure you close the originals so that you don’t accidentally work on them instead of the copies IMAGE>DUPLICATE. Make all the necessary adjustments. For example, levels, curves, etc. Select the photo that you will be using as the faded background. At this point you can minimize the second photo until you are ready to use it. Duplicate the image. LAYER>NEW>LAYER FROM BACKGROUND. Name the file “faded baby” and press ok. You will need to have the layers palette open so let’s do that now. WINDOW>LAYERS or press F7.
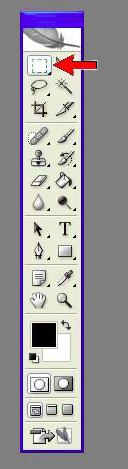
Step 3 - Using the Rectangular Marquee Tool
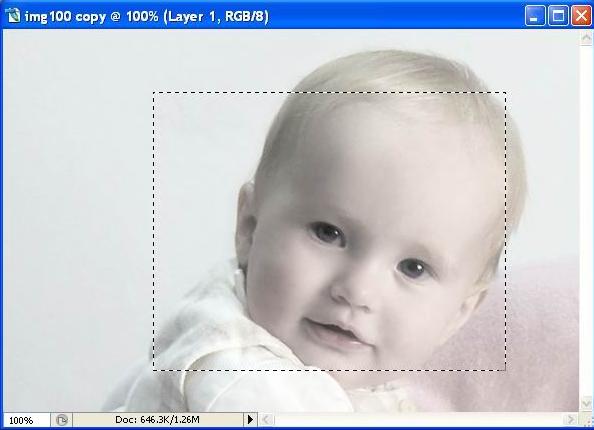
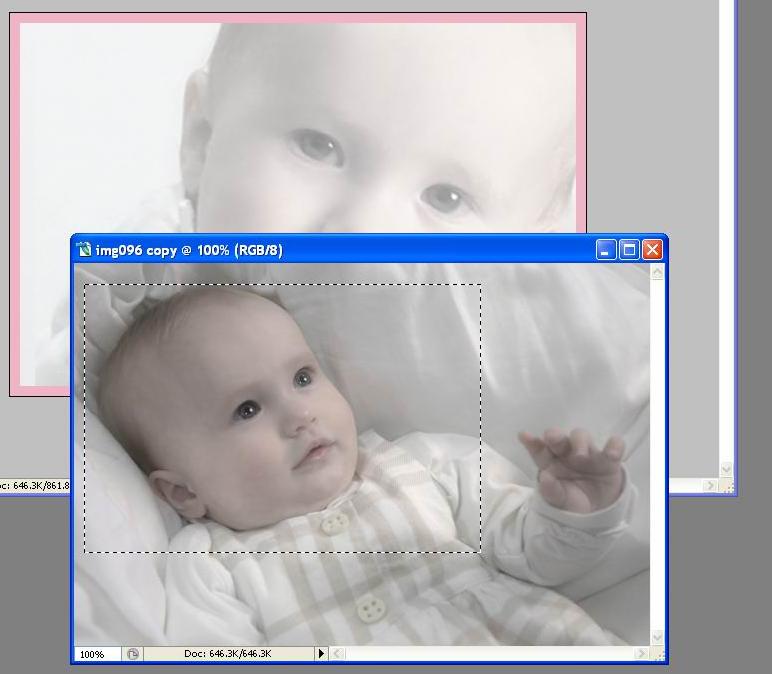
If you wish the entire photo to be the background then skip to step 5. If you only want a part of the photo then click on the Rectangular Marquee Tool shortcut M and select the part that interests you. In this case I wanted to see more of the baby’s face and get rid of the white space to her left.
Step 4 - Using the Free Transform Tool
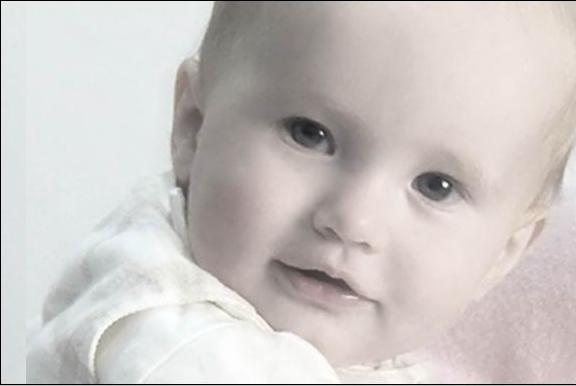
Right click on your selection and select Free Transform or you can go Edit>Free Transform, Ctrl+T. Hold down the Shift key and drag the corners to maintain the same perspective of your image. Pull the selected area out so that it is big enough to fill in your work space. When you are done select the check mark at the top of the screen to apply.
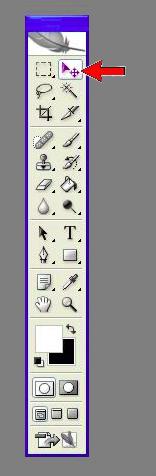
You can move the image around to where you want it located. Select the Move Tool, V from the tool box and place your selection to fit. To remove the marching ants press Ctrl + D to deselect.
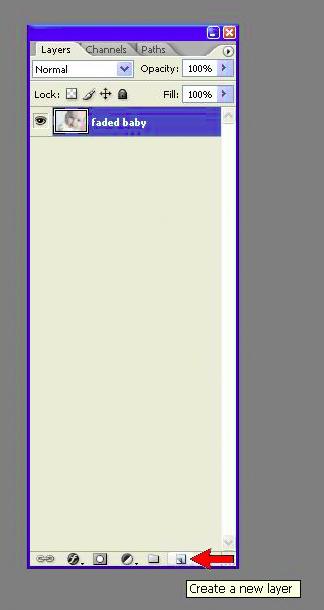
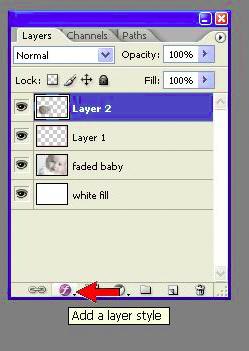
Step 5 - Creating a New Layer
From the layers palette click on the new layer icon at the bottom. Once the layer is created rename it “white fill”.
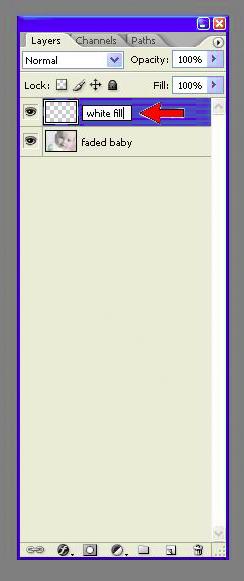
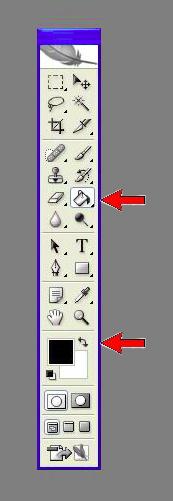
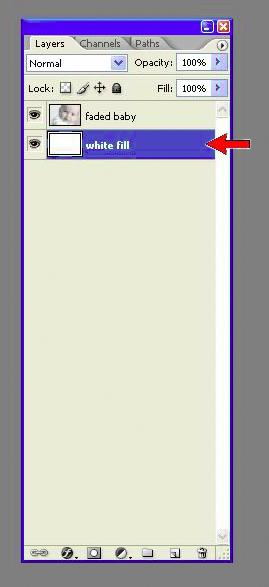
Step 6 - Using the Paint Bucket and Moving Layers
Your tool box has a default of black for the foreground and white as the background. You can change the colours of these by clicking on each one and selecting a new colour. If you wish to go back to the default click on the small icon in the bottom left corner If you wish to switch colours click on the curved arrow key in the top right corner or press X, give it a try.
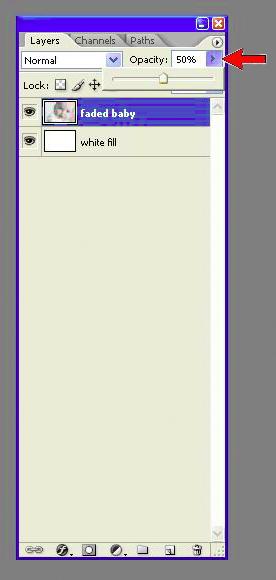
Ensure that the foreground is white and that your “white fill” layer is the active layer. You know which layer is active when it is highlighted. Click on the Paint Bucket Tool, G and fill your layer so that it is all white. Once you have this done you need to go to the layers palette and drag the “white fill” layer below the “faded baby” layer.
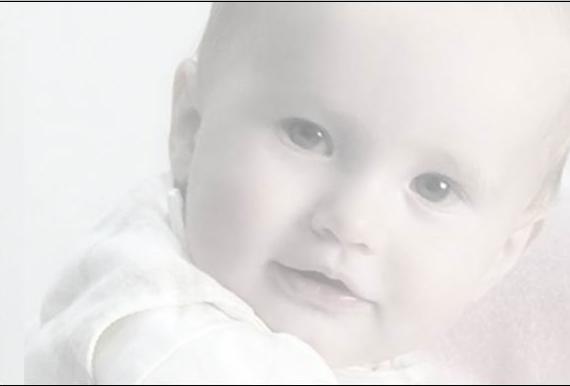
Step 7 - Changing the Opacity of an Image
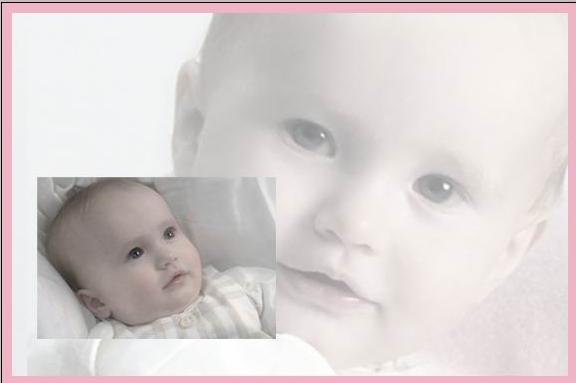
On your layers palette click on the opacity slider and reduce the opacity to 50 percent. You can use this style as an announcement and just add your text over the faded image. If you want to do this skip to step 11.
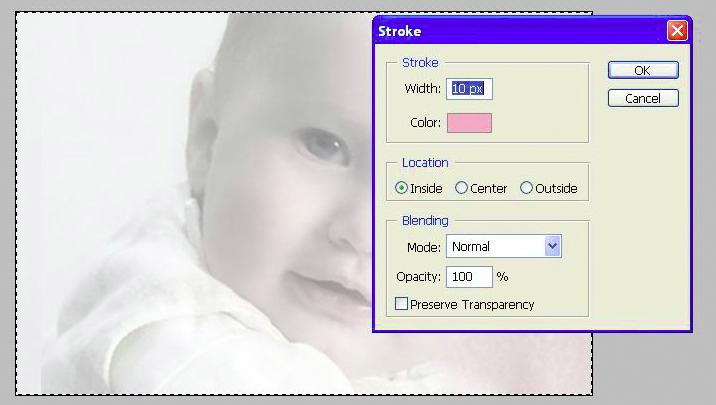
Step 8 - Framing the Image
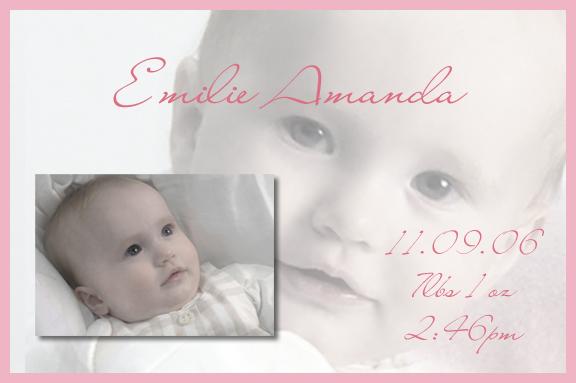
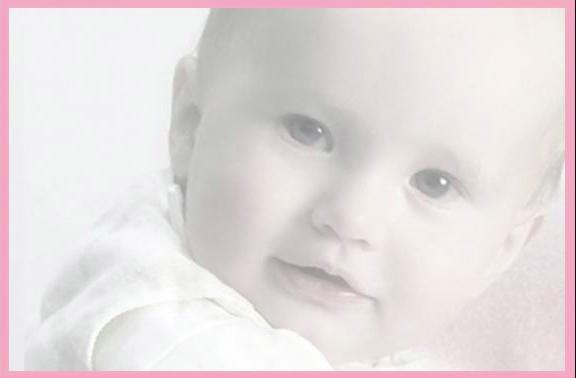
First create a new layer (see step 5 for a refresher on this) rename this layer “border”. Have the “border” layer active. Using your Rectangular Marquee Tool, M (step 3) select your entire image. Once it is selected right click on the image and select stroke. A small dialog box will appear. Insert 10 pixels for the width. More or less depending on the size you would like the thickness of your border. Click on the colour box and select a colour that you would like. Using a subtle colour that is in the photo already is always nice. I pulled out the pink of the blanket and used that as my border colour. Click on inside for the location. Blending Normal and Opacity 100 percent. Click ok to apply. You will see the border around your image. To get rid of the marching ants hit CTRL + D to deselect.
Step 9 - Moving One Image to Another
Open up your second image. If you haven’t already done so in Step 1 duplicate your image so that you are not working on your original. Make all the necessary adjustments. Again, you may only want a part of this image. With your Rectangular Marquee Tool, M select the part of the image you want to use. Use the Move Tool, V to move the selection to your first image. Just click and drag. You will notice in the layers palette a new layer is created with this selection. Name this layer “main baby”. With the Free Transform tool, CTRL + T resize the selection. Don’t forget to use the Shift key and drag the corners to maintain the same perspective of your image. Once you have the size you like hit CTRL + D to deselect the image. Use the Move Tool, V to move it where you would like it.
All the techniques in this step have been done previously, so you might have to go back and review the earlier steps.
All the techniques in this step have been done previously, so you might have to go back and review the earlier steps.
Step 10 - Adding a Layer Style
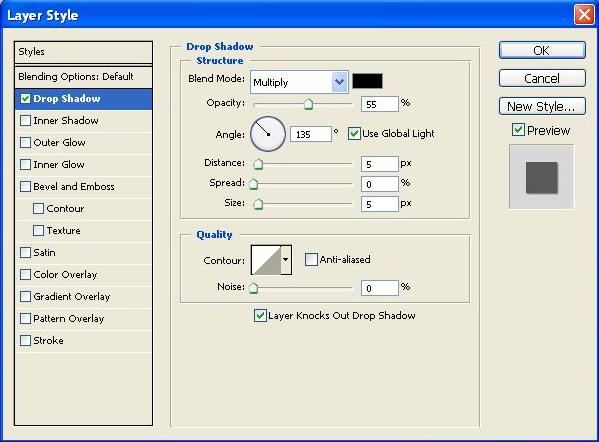
With the “main baby” layer highlighted, from the layers palette click on the small “f” at the bottom and select from the menu drop shadow. A dialog box will appear. You can play around with the angle and opacity until you get the desired look. I used an angle of 135 and a 55 percent opacity. Press ok to apply.
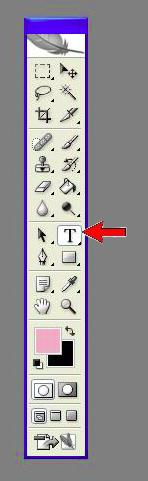
Step 11 - Adding Text
Select the Text Tool, T from the tool bar. From the text option menu select your font, size and colour. Select the area you want the text and start typing in the details. You can resize the text area by clicking on the squares and pulling it in or out. Again use the Move Tool, V to position the text to the desired location. You will notice that the new text will be seen in its own layer on the layer palette. You can do as many text layers as you need. I used LanieDaySH, but any script font that you like will do. If you don’t have this you can easily get it by searching for fonts and download them for free. Once you get the font you want, locate your Fonts Folder and pop it in there.

Step 12
One of the wonderful things about PhotoShop is that there are many ways to get to your end result. This tutorial is for beginners and I have tried to include as many learning elements as I could. Remember, this programme is only limited to your imagination. Have fun taking photos of your new little one and when and if you get some free time to yourself enjoy being creative. Have Fun!
Tidak ada komentar:
Posting Komentar